Communication Module I: Sending emails to your supporters

Build a simple or custom email, choose your recipients and send it in four steps.

7 min read

Create a simple email or design a custom one, choose your members or donors, and send it from Ideali.

The Communication module lets you email your supporters straight from Ideali. You choose who receives it from your members and donors, write or design the email, and send it. A live preview shows how your email will look as you build it.

To start, go to Communication > Emails in the left sidebar and click Create Email. Every email follows four steps: Campaign Info, Compose (or Email Designer), Recipients and Review & Send.

Simple email or custom email?

You choose the type in the first step, and it decides what the second step looks like.

  • Simple Email — A banner image plus a message. Best for quick updates, reminders and thank-you notes.
  • Compose Custom Email — Your own layout, built in a drag-and-drop email designer. Best for newsletters, appeals and announcements.

Step 1: Campaign Info

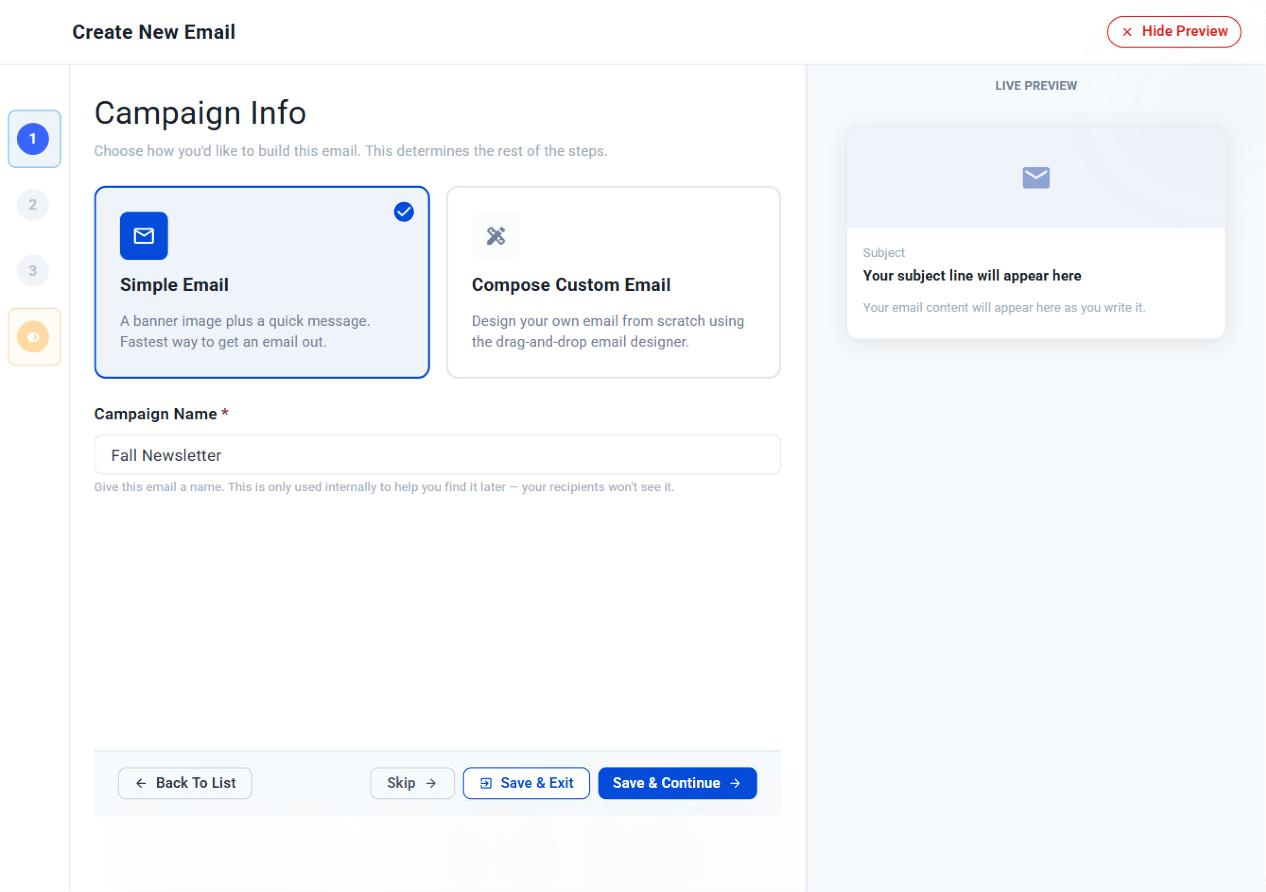
  1. Select Simple Email or Compose Custom Email.
  2. Enter a Campaign Name, for example Fall Newsletter. This name is only used to help you find the email later. Your recipients won’t see it.
  3. Click Save & Continue.
The Campaign Info step with Simple Email selected and the campaign name Fall Newsletter
Choose the email type and give your email a name.

Step 2a: Compose a simple email

This step has two parts: the banner image and the email content.

Add a banner image

Choose one of three ways to add your banner:

  • Drag & Drop — Drag your image onto the upload area, or click it to browse your files. JPG, PNG and GIF files up to 5 MB are supported. You can also pick a suggested image, such as Community, Education, Healthcare, Environment or Food Relief.
  • Generate Using AI — Describe the banner you want, choose 16:9 Widescreen or 1:1 Square, and click Generate Image. AI creates an image from your description. If you don’t like the result, change your description and generate again.
  • Stock Images — Search a library of stock photos, for example charity, education or community. Click Load More to see more results.

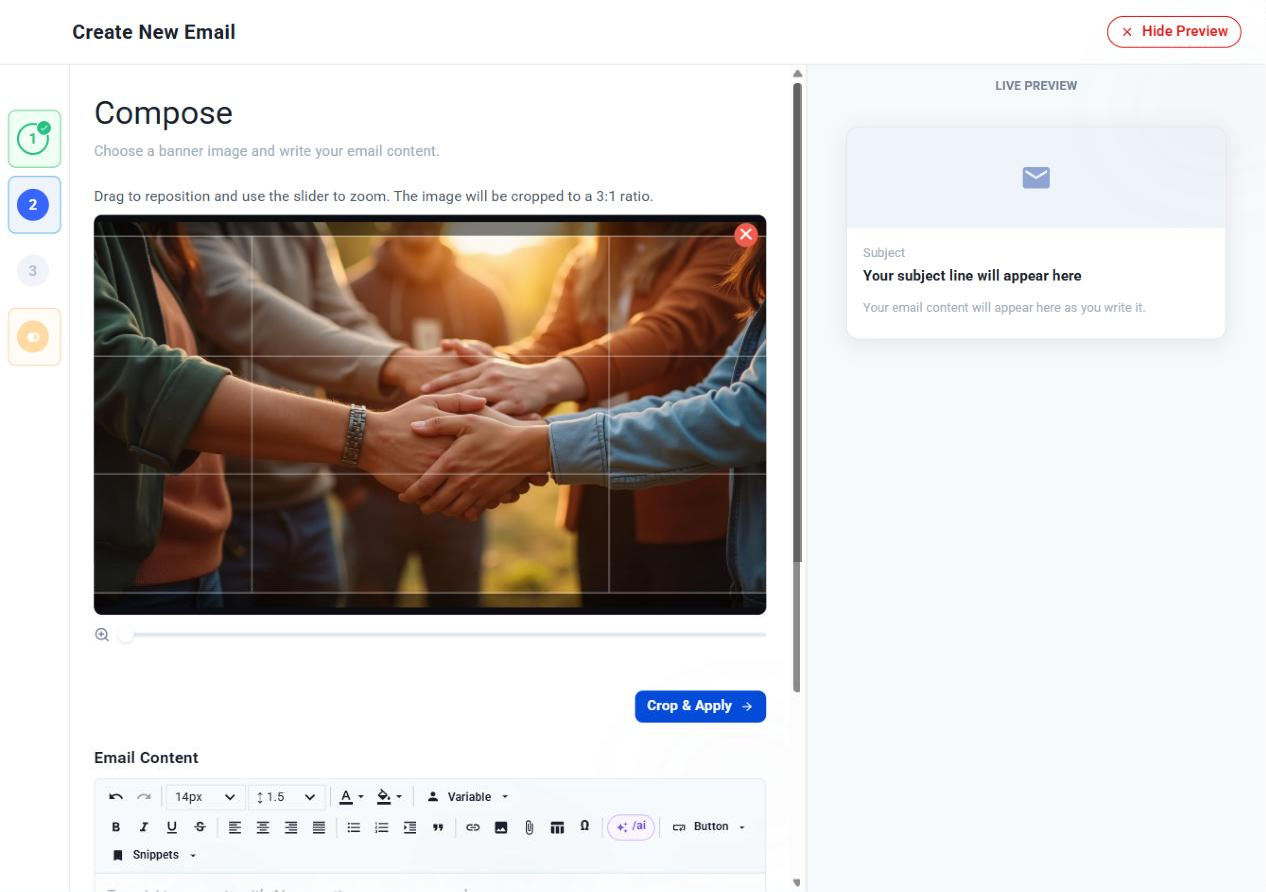
Drag the image to reposition it and use the slider to zoom. Banners are cropped to a 3:1 ratio. Click Crop & Apply when you’re happy with it. To replace it, click the red delete icon on the banner and confirm.

The banner crop tool with a stock photo, a zoom slider and the Crop and Apply button
Reposition and zoom your banner, then click Crop & Apply.

Write your email content

Write your message, up to 5,000 characters, in the Email Content editor. The toolbar lets you:

  • Format text — Change the font size, line spacing, text color and highlight, and add bold, italic, underline, strikethrough, alignment, lists, indents and quotes.
  • Insert content — Add a link (with its text and URL), an image (uploaded from your device or from an image URL), a file attachment, a table or a special character.

The editor also has four tools to help you write:

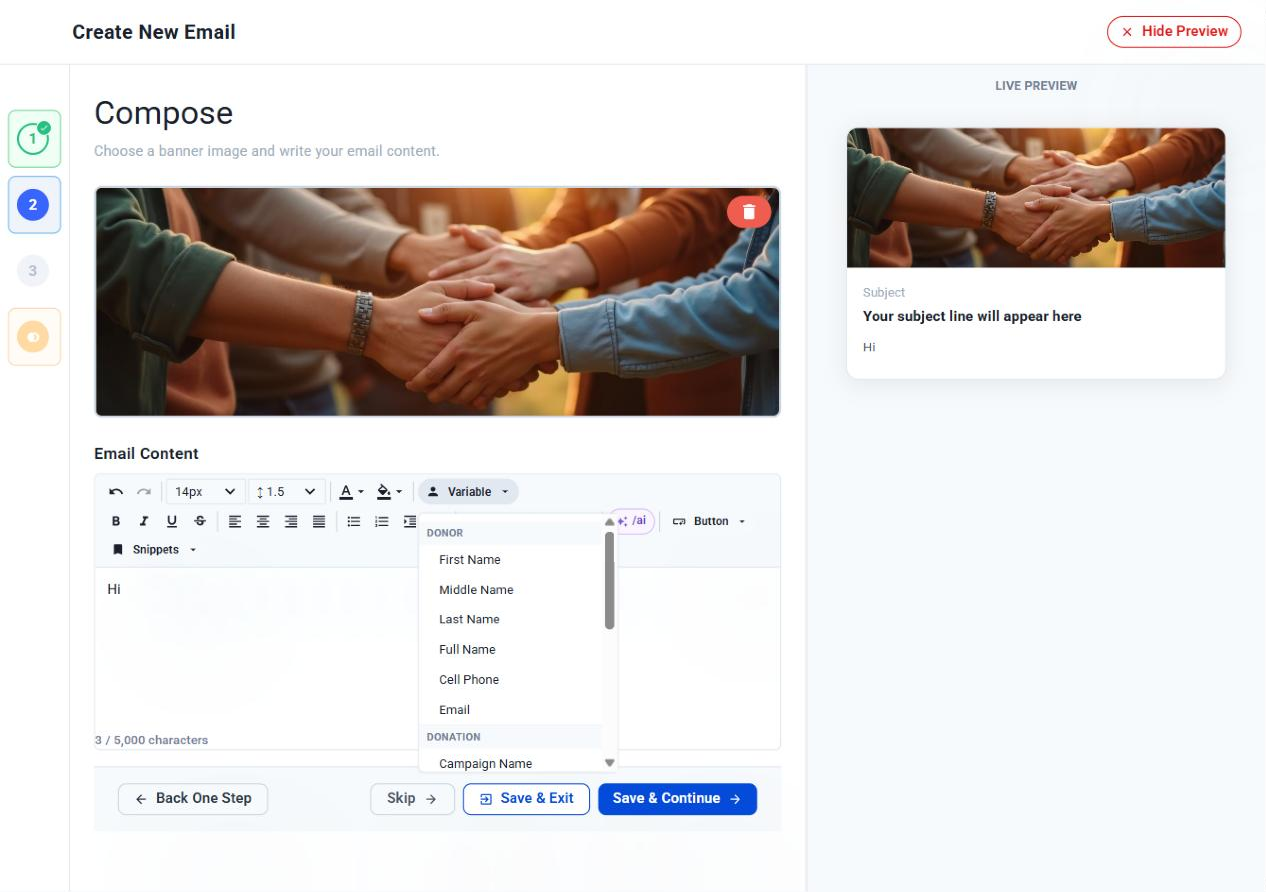
  • Variable — Insert personal details that are filled in for each recipient. Variables are grouped into Donor (First Name, Middle Name, Last Name, Full Name, Cell Phone, Email), Donation (Campaign Name, Donation Currency, Donation Amount, View Invoice), Invoice (Invoice No, Invoice Date Time Utc), Organizer (Organizer Name, Organizer Email) and Other (Current Date Time Utc).
  • /ai — Type /ai in the editor, or click the /ai button, to open the AI Email Generator. Describe the message you need, and AI writes it for you. You can then edit the text like any other content.
  • Button — Add a call-to-action button. Choose Campaign to link to one of your campaigns, then enter a button label and select the campaign. Choose Custom Link Button to link to any page, with your own label and URL.
  • Snippets — Save text you use often, such as a sign-off or your contact details. Click Snippets > Save as new snippet, and give it a name (3 to 40 characters) and a short description. Your saved snippets appear under Your snippets, where you can insert, update or delete them.
The Variable menu open in the email editor, listing First Name, Middle Name, Last Name, Full Name, Cell Phone and Email
Use the Variable menu to personalize your email.

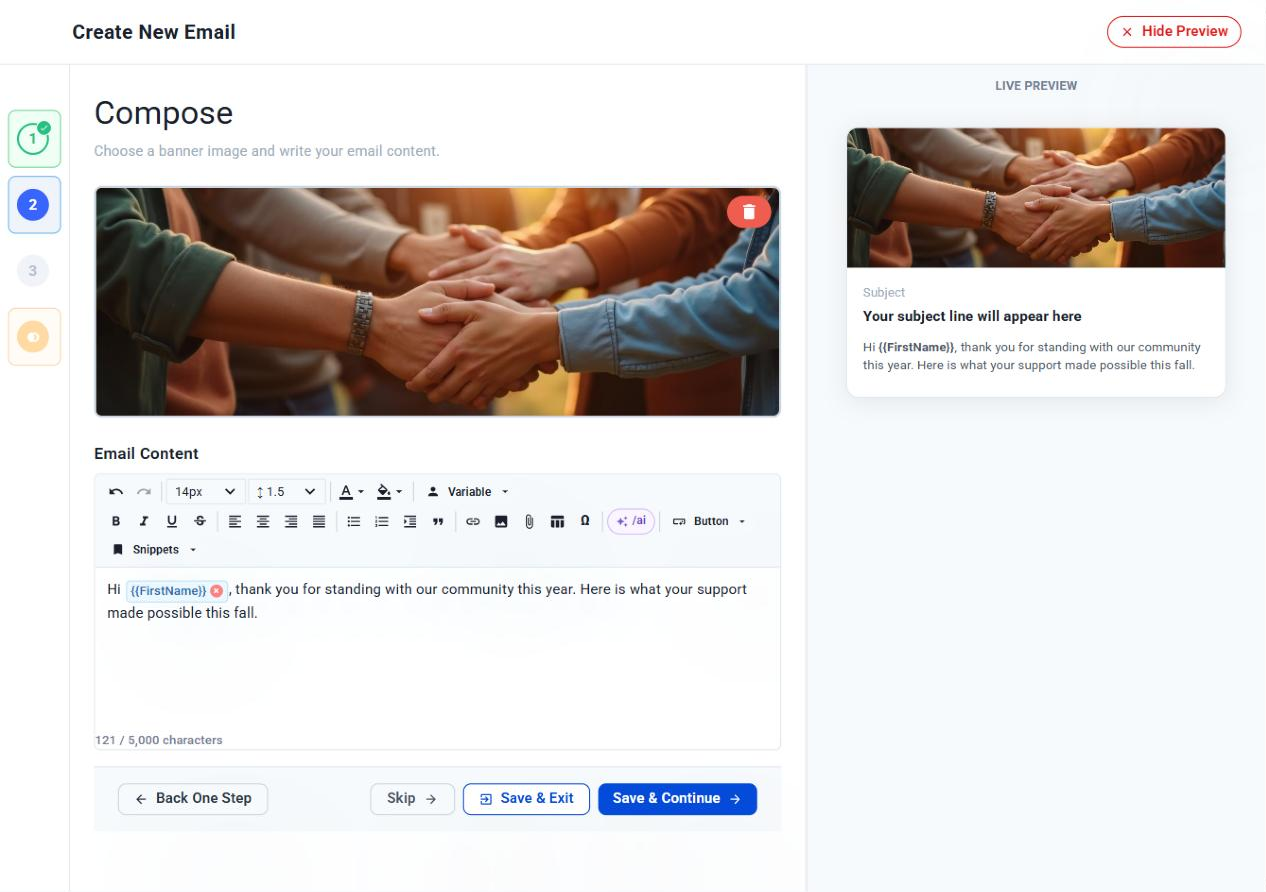
A variable shows as a tag such as {{FirstName}} in the editor and is replaced with each recipient’s details when the email is sent.

The Compose step with a banner image, a personalized message and the live preview
Your banner and message appear in the live preview as you write.

Click Save & Continue.

Step 2b: Design a custom email

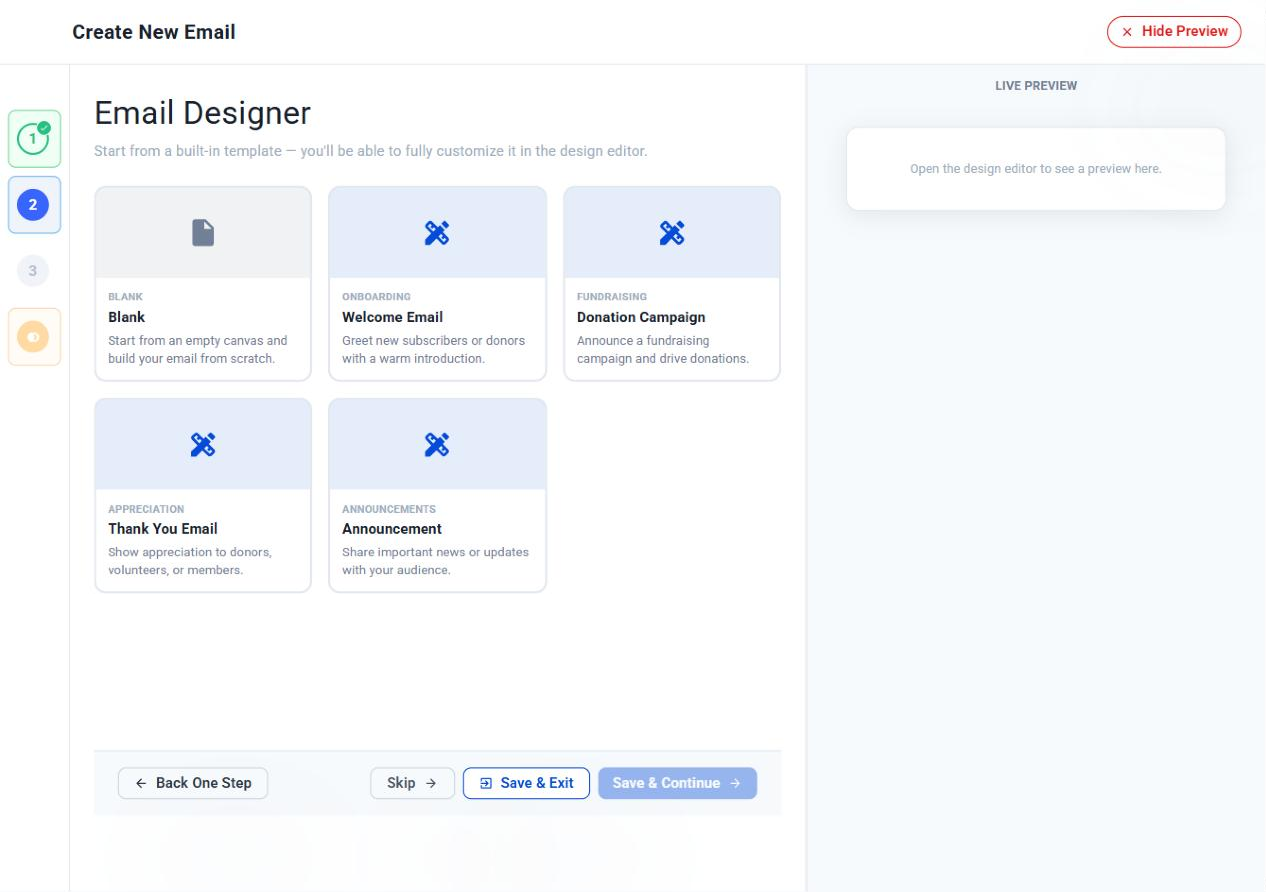
If you chose Compose Custom Email, pick a template to start from. You can fully customize any of them.

  • Blank — Start from an empty canvas.
  • Welcome Email — Greet new subscribers or donors.
  • Donation Campaign — Announce a fundraising campaign and drive donations.
  • Thank You Email — Show appreciation to donors, volunteers or members.
  • Announcement — Share important news or updates.
The Email Designer step showing the Blank, Welcome Email, Donation Campaign, Thank You Email and Announcement templates
Pick a template to open it in the email designer.

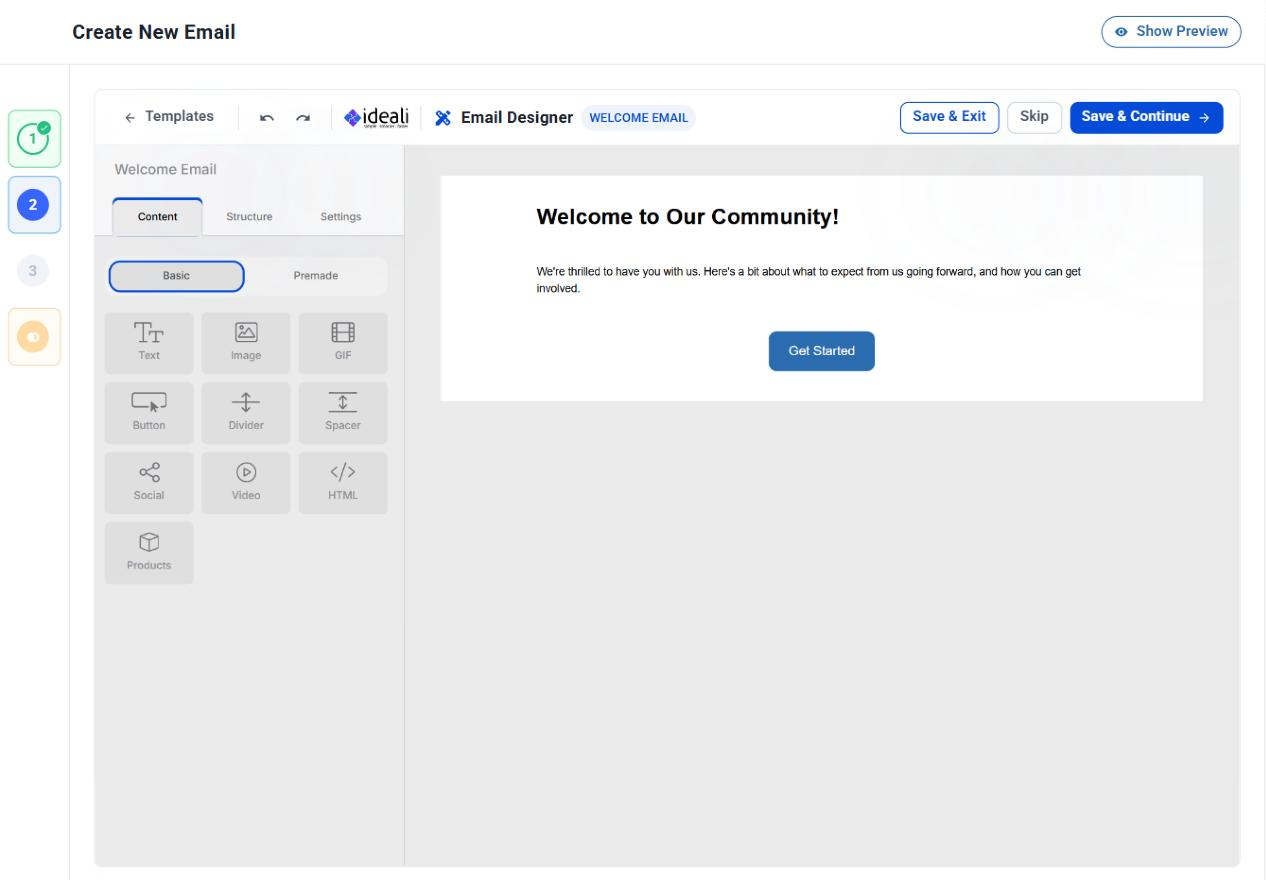
The designer shows your email in the middle and the building tools on the left:

  • Content — Drag blocks into your email: Text, Image, GIF, Button, Divider, Spacer, Social, Video, HTML and Products. Switch to Premade for ready-made sections.
  • Structure — Add rows to your layout. Choose from one to four columns, in equal or uneven widths, then drag content blocks into each column.
  • Settings — Set the look of the whole email:
    • Invisible header — Preview text that shows next to the subject line in most inboxes.
    • Template width — The maximum width of your email. 600 pixels is recommended for desktop.
    • Template colors — The email background color, or a gradient. Not every email app shows gradients, so set a similar background color as a fallback.
    • Font settings — The color, size and font family for Heading 1, Heading 2 and paragraph text, plus the default line height and list spacing.
    • Block defaults — Default styles for structures, columns, buttons, text, dividers, spacers and images, so every new block you add matches your design.
The email designer with the Welcome Email template open and content blocks on the left
Drag blocks from the left panel into your email.

Click any element in your email to edit its text, image or style. Use the undo and redo arrows if you change your mind, or Templates to pick a different template. When your design is ready, click Save & Continue.

Step 3: Recipients

  1. Enter the Subject Line your recipients will see in their inbox.
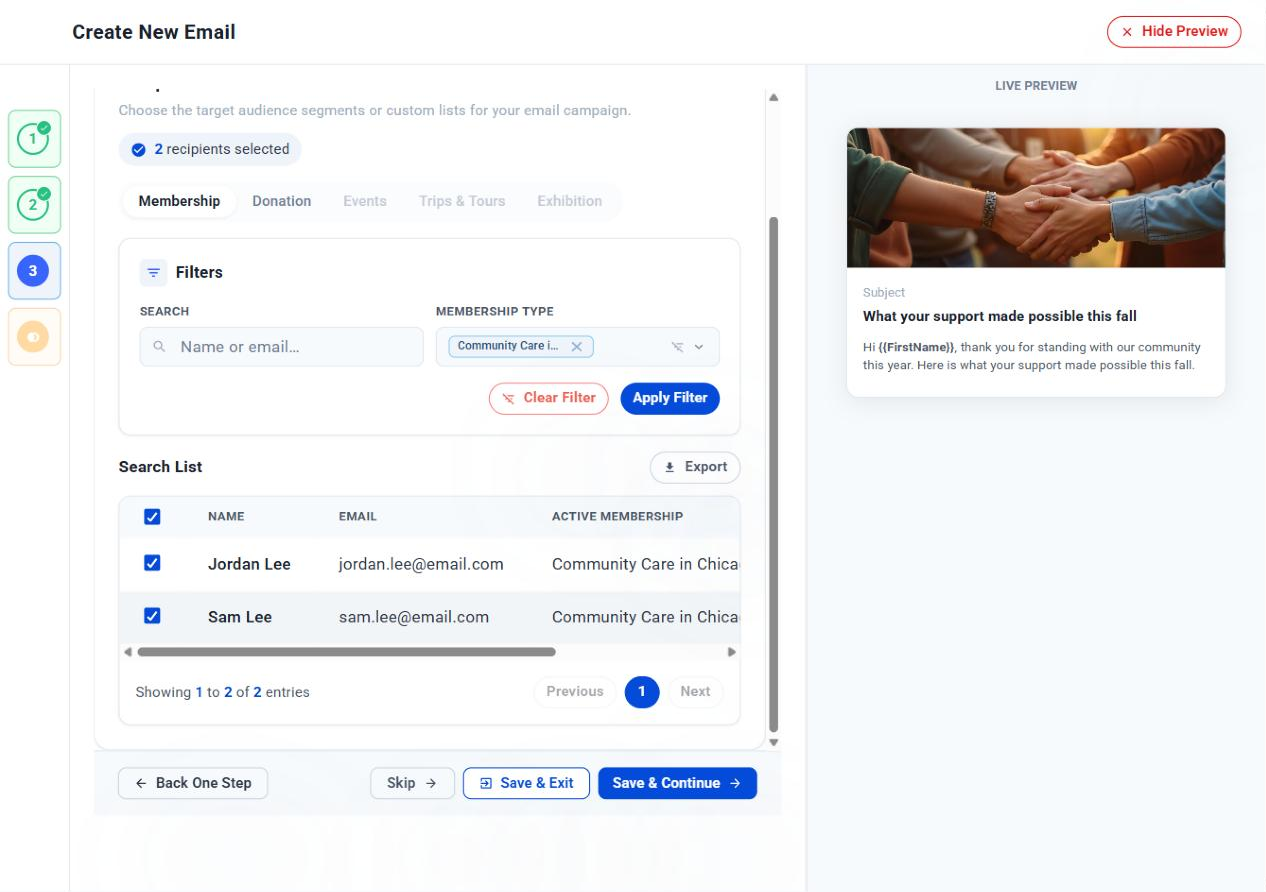
  2. Choose a recipient tab:
    • Membership — Filter your members by name, email or membership type.
    • Donation — Filter your donors by campaign, name or email.
  3. Click Apply Filter to update the list.
  4. Tick the people you want to email. To select everyone in the list, tick the box in the header row.
  5. Check the count at the top, for example 2 recipients selected, then click Save & Continue.
The Recipients step with members filtered by membership type and two recipients selected
Filter your list and tick the people who should receive the email.

Click Export above the list if you want a copy of the recipients shown.

Step 4: Review & Send

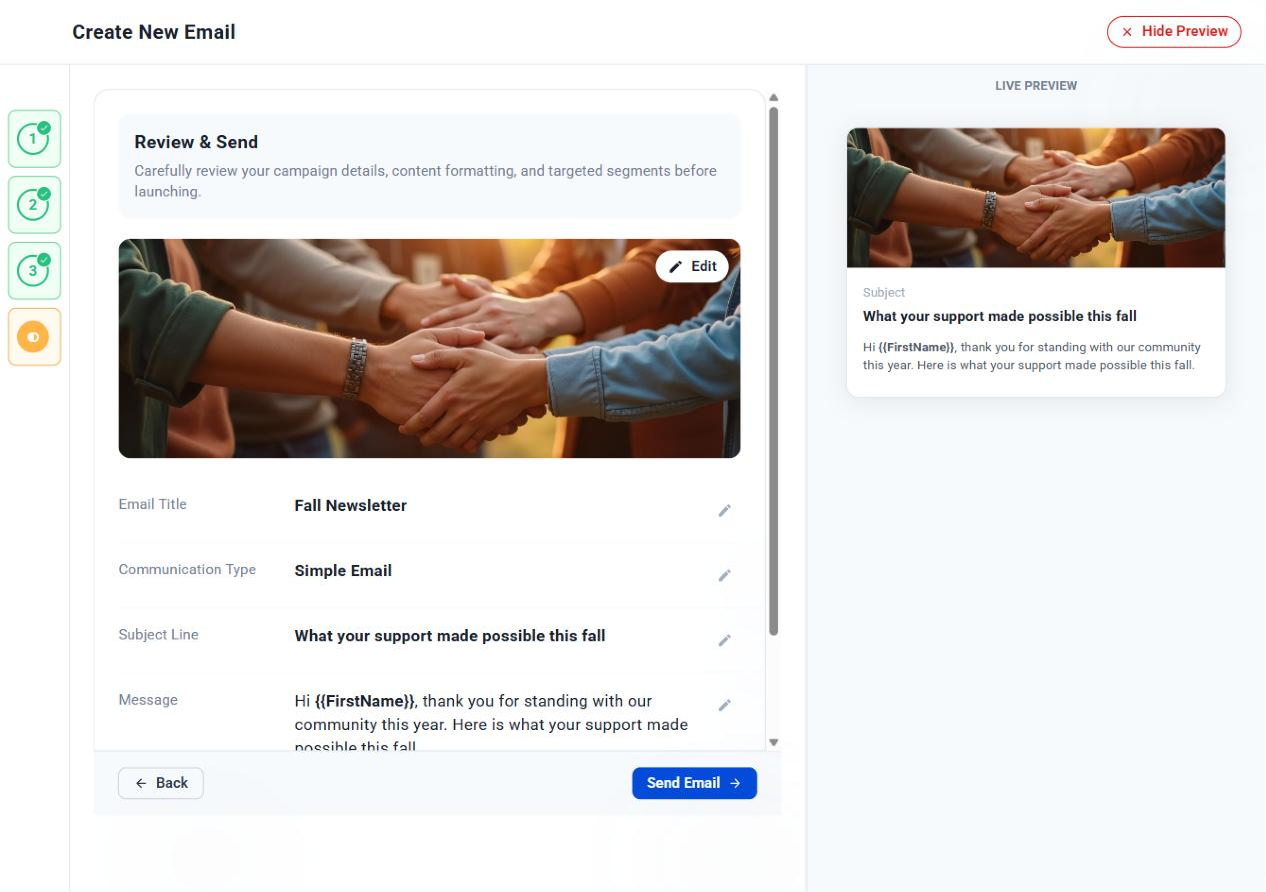
Check the banner, email title, communication type, subject line, message and total number of recipients. To change anything, click the pencil icon next to it, or Edit on the banner.

The Review and Send step showing the banner, email title, type, subject line and message
Review everything before you send.

When you’re ready, click Send Email. Your email goes out straight away, and you’ll see a confirmation that it is on its way. The email’s status in your Emails list changes from Draft to Sent.

Key terms

  • Campaign name — The internal name of your email, shown in your Emails list. Recipients never see it.
  • Subject line — The line recipients see in their inbox.
  • Banner — The image at the top of a simple email.
  • Variable — A placeholder such as {{FirstName}} that is replaced with each recipient’s own details.
  • Draft — An email you have started but not sent yet.

Good to know

  • Sending is immediate — Emails go out as soon as you click Send Email, so review them carefully first.
  • Drafts are saved for you — Your progress is saved each time you click Save & Continue or Save & Exit. Find your draft in the Emails list and choose Continue Editing.
  • Skip a step — Click Skip to move ahead and come back to a step later.
  • More room to work — Click Hide Preview at the top right to hide the live preview, and Show Preview to bring it back.
  • Who you can email — You can currently email your members and donors. More recipient groups are coming soon.

Next steps

Once your email is sent, learn how to find it again and see who received and opened it in Managing and tracking your emails.

Go to Top