

Creating a Donation Campaign
Learn how to create and publish a donation campaign on Ideali using the step by step campaign builder, from setting your goal to publishing your page.
📹 Watch: Setting Up your First Campaign ⏱ 1m 17s
The builder is divided into the following steps:
- Campaign Name and Dates — Give your campaign a name and set your start and optional end date.
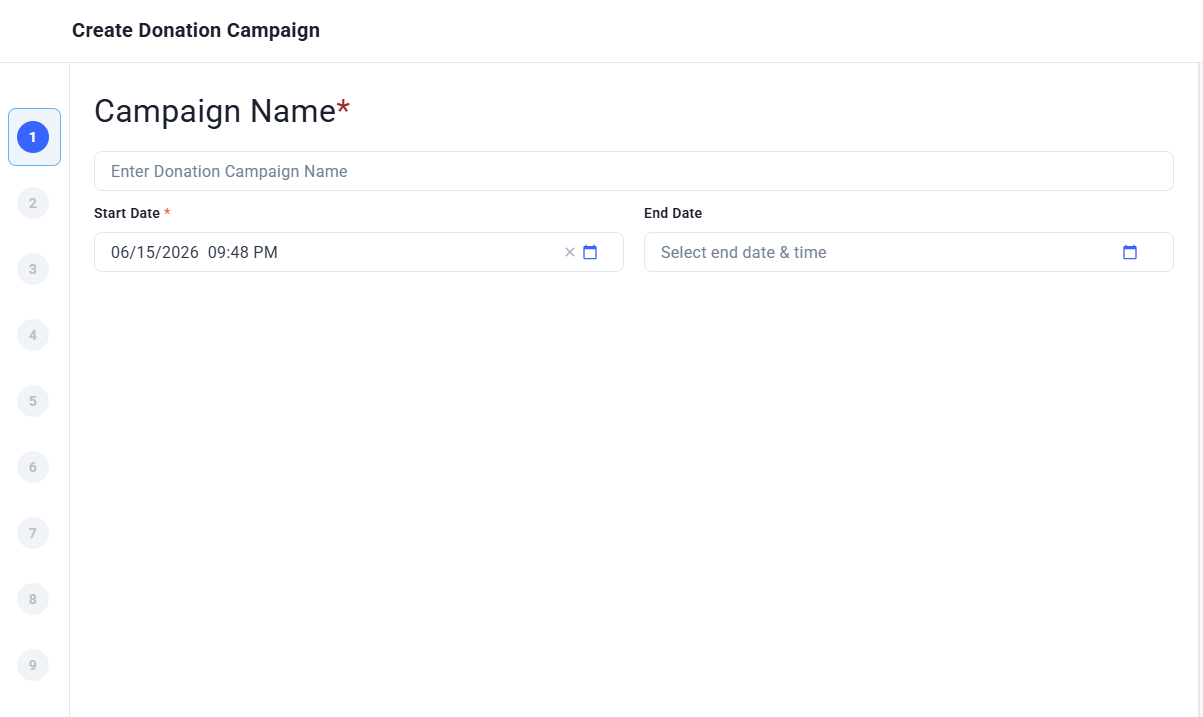
Step 1: Campaign Name and Dates - Set Goal — Enter your fundraising target and choose whether to display it publicly.
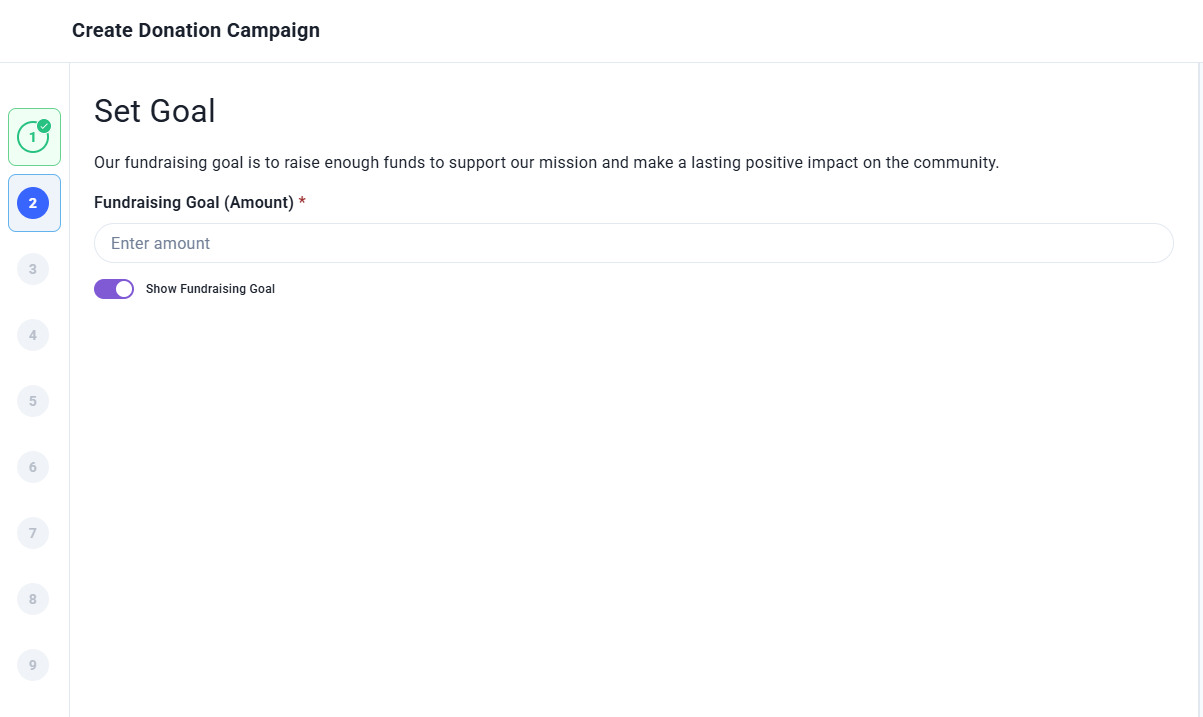
Step 2: Set Goal - Add Description — Write about your cause or use the built in AI generator to create one instantly.
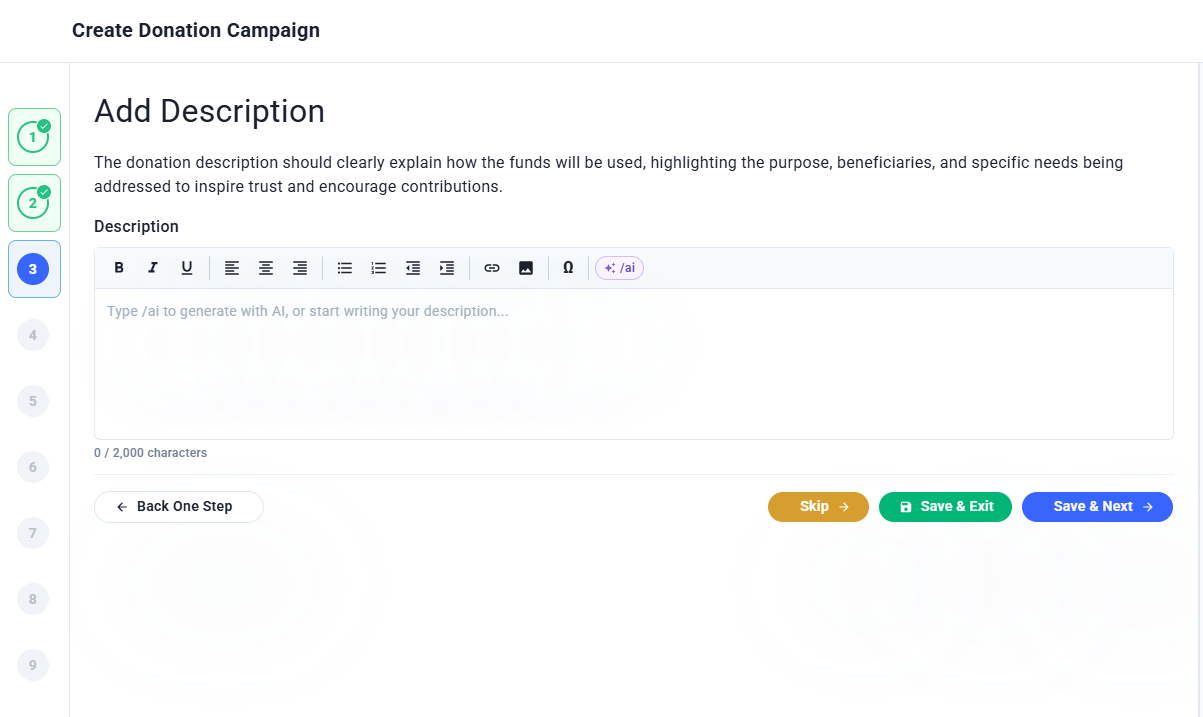
Step 3: Add Description - Set Payment Account — Choose which connected payment account will receive donations and select your accepted payment methods. Learn how to set up a payment account.
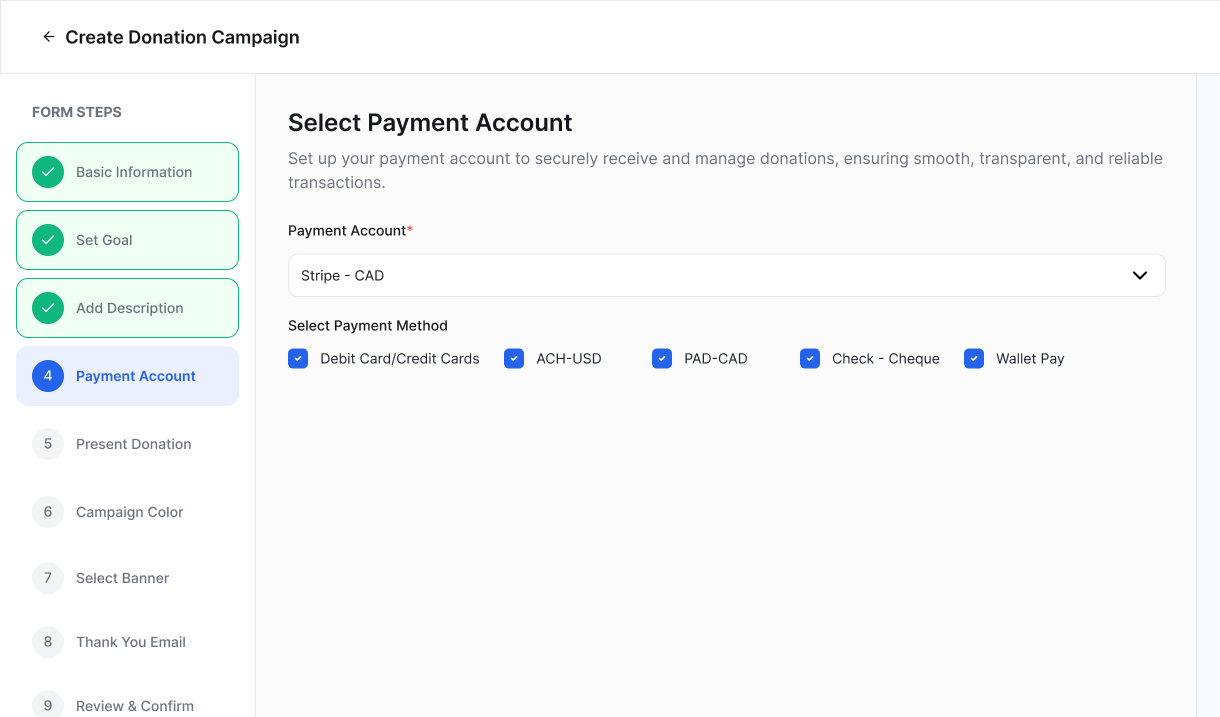
Step 4: Select Payment Account - Preset Donation Amounts — Set suggested giving amounts for one time, monthly, and yearly donors.
- Campaign Color — Choose a color that matches your cause or organization branding.
- Campaign Banner Image — Upload your own image, choose from stock photos, or generate one using AI.
- Thank You Email — Customize the email donors receive after contributing.
- Review and Confirm — Review your campaign details and publish when ready.
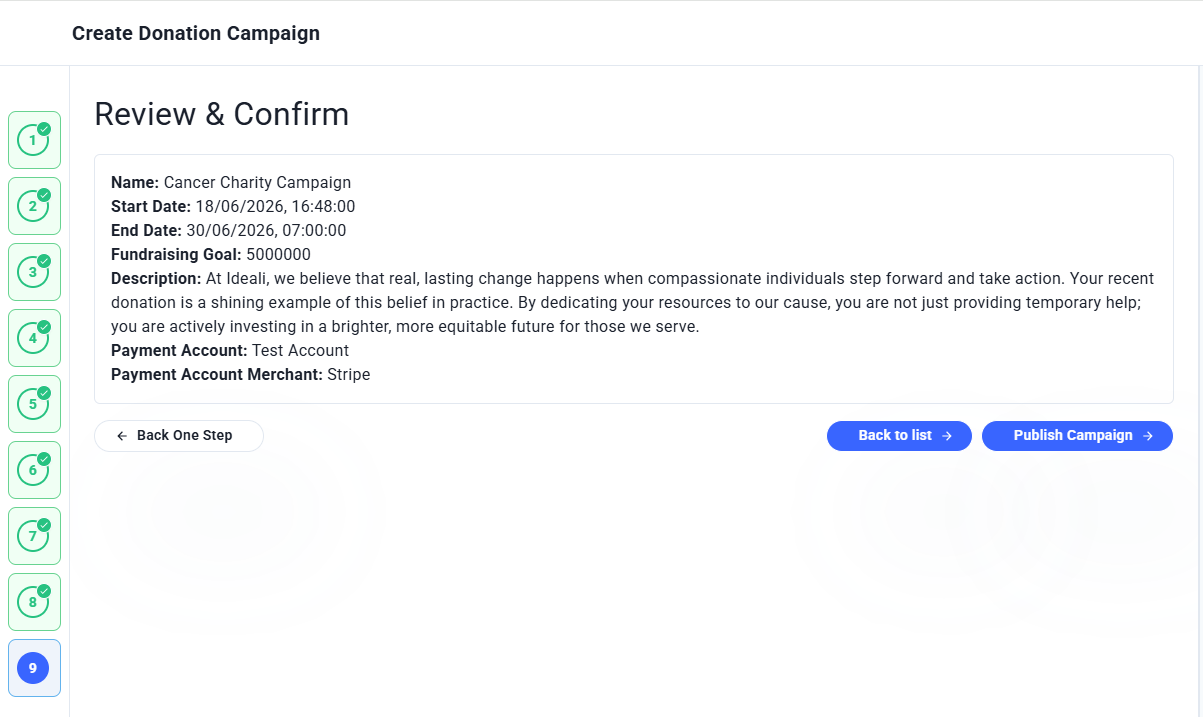
Step 9: Review and Confirm
At any point during the process you can click Save and Exit to save your progress and return later, or click Back One Step to make changes to a previous step.
Using the AI description and banner generator
Learn how to use Ideali's built in AI tools to generate a compelling campaign description and a custom banner image directly inside the campaign builder.
Both tools are available inside the campaign builder and can be accessed during the relevant steps.
AI Description Generator
When you reach the Add Description step in the campaign builder, you will see a text editor with an AI prompt option. Instead of writing from scratch, type a brief summary of your campaign into the prompt field and press Enter. The AI will generate a full description for you based on what you provide. You can then edit, refine, or rewrite any part of it before saving.
This is especially useful if you are unsure how to present your cause in writing or want a strong persuasive starting point quickly.
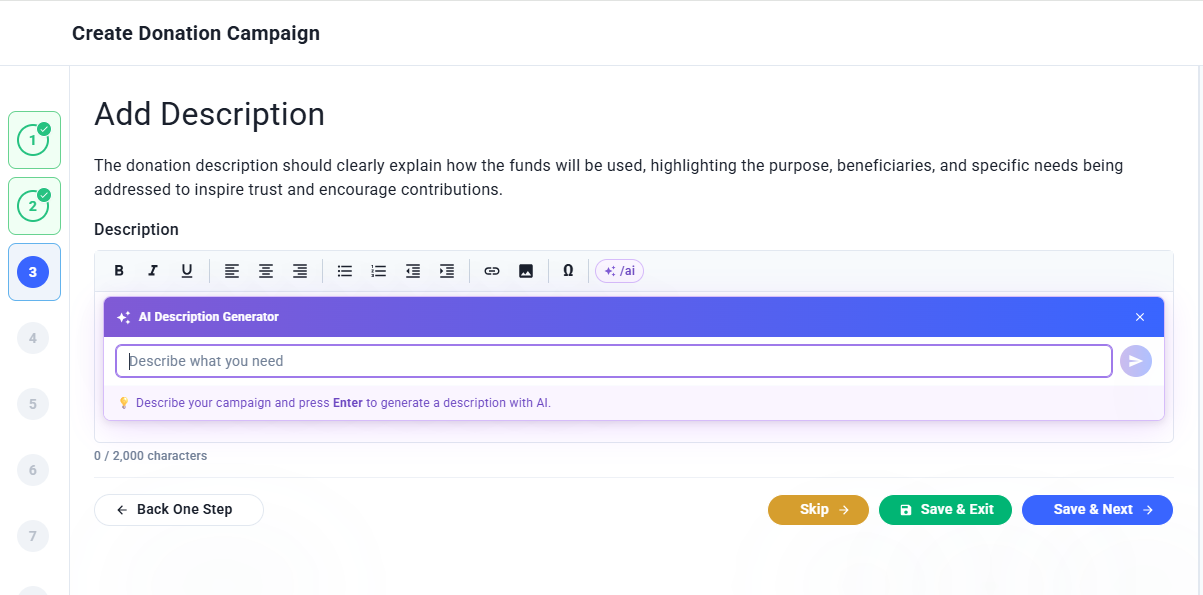
📹 Watch: Use AI in desccription ⏱ 1m 35s
💡 Best Practices for AI Generated Descriptions
- Be specific about your cause and who it helps.
- Mention the goal amount and what it will be used for.
- Include the tone you want such as urgent, hopeful, or informative.
- Review and personalize the generated text before saving.
Example prompt: “We are raising funds to provide school supplies and meals for 200 underprivileged children in rural communities. The goal is $4,000 and every donation makes a direct impact.”
AI Banner Image Generator
When you reach the Campaign Banner Image step, select the Generate Using AI tab. Describe the image you want and the AI will create a custom banner tailored to your campaign. This is a great option if you do not have a professional photo available and want something visually relevant to your cause.
Once generated you can accept the image or try a different prompt until you get a result you are happy with.
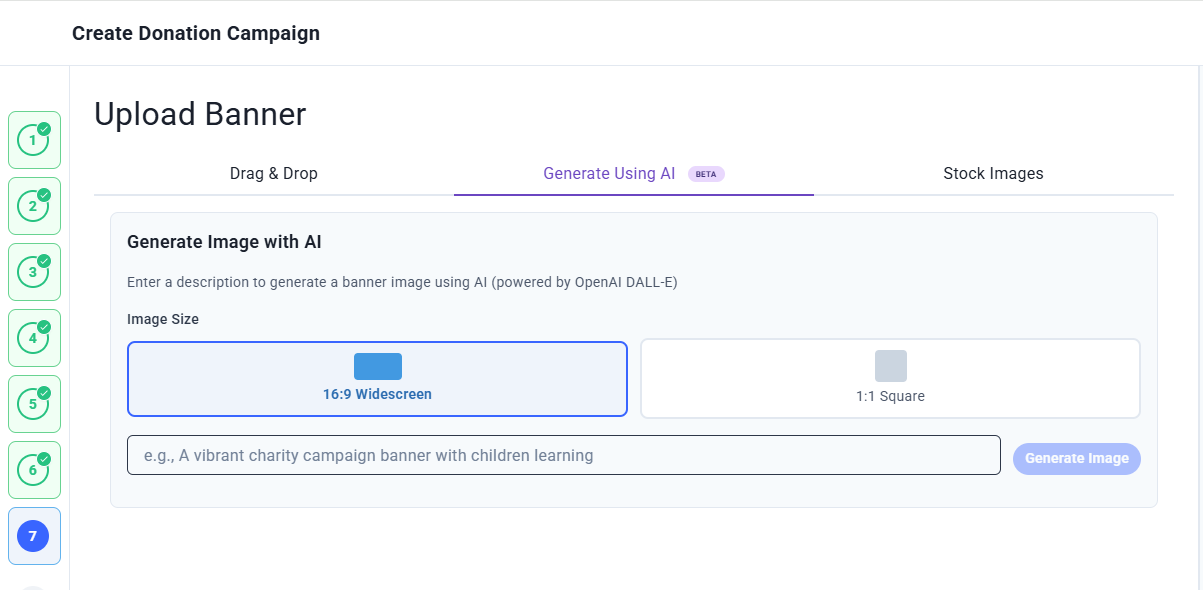
💡 Best Practices for AI Generated Banners
- Use clear and specific prompts.
- Mention the cause type such as education, healthcare, or food relief.
- Include the mood or style you want such as hopeful, professional, or warm.
- Use descriptive keywords to guide the visual output.
Example prompt: “Professional charity banner for an education support campaign with a hopeful atmosphere featuring children in a classroom setting”
Customizing your thank you email
Customize the thank you email your donors receive after contributing by editing the subject line and adding personalized variables.
The thank you email is configured in Step 8 of the campaign builder. The email begins with a default template that cannot be edited. You can add your own personalized message after the default content.
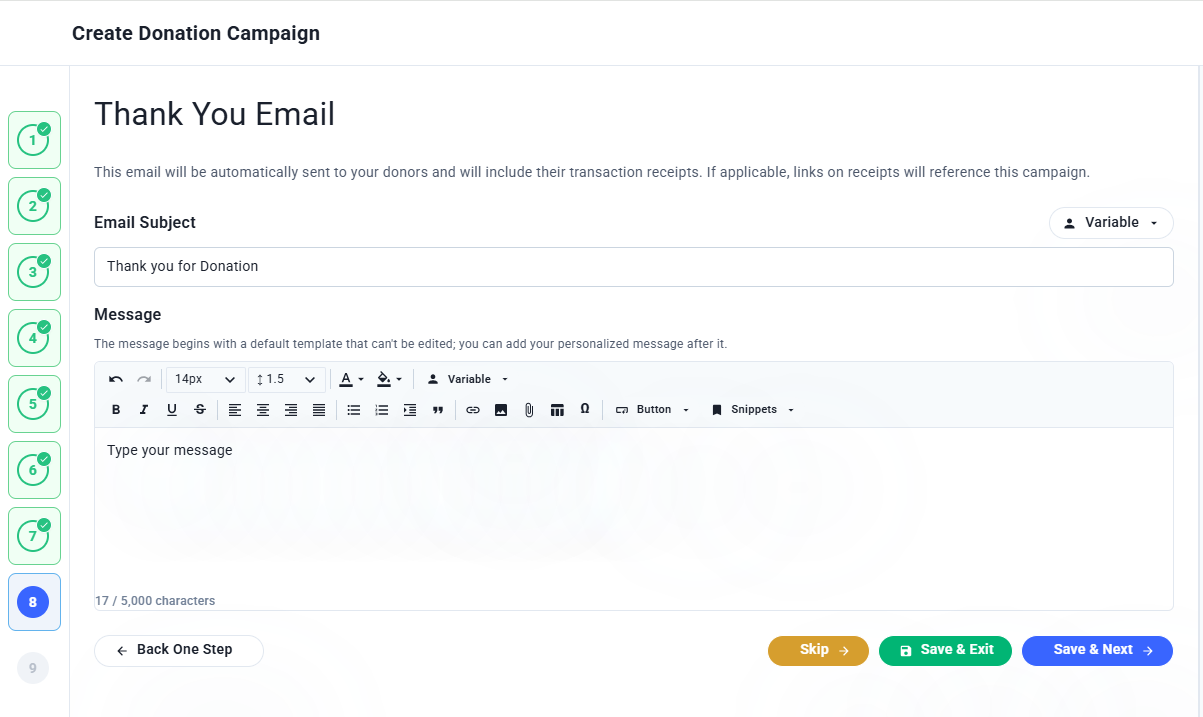
Email Subject Line
You can edit the subject line that donors see in their inbox. The default is “Thank you for Donation” but you can change this to something more personal or specific to your campaign.
Personalizing Your Message with Variables
Use the Variable dropdown in the email editor to insert dynamic fields that automatically pull in real information for each donor. This allows you to send personalized emails without manually editing each one.
The available variables are organized into the following categories:
- Donor — First Name, Middle Name, Last Name, Full Name, Cell Phone, and Email.
- Donation — Campaign Name, Donation Currency, and Donation Amount.
- Invoice — Invoice Number and Invoice Date.
- Organizer — Organizer Name and Organizer Email.
- Other — Current Date and Time.
To learn more about how your organization details appear in donor communications, see Setting up your organization profile.
Managing your campaign after publishing
Learn how to monitor campaign performance, read your campaign stats, and access management options like donor lists, recurring donations, and archiving from your Campaigns page.
Once your campaign is published it appears in your Campaigns list where you can monitor its performance and take action without having to open the campaign builder again. To access your campaigns, go to Donation in the left sidebar and click Campaigns.
Reading Your Campaign Card
Each campaign card gives you a quick snapshot of how your campaign is performing:
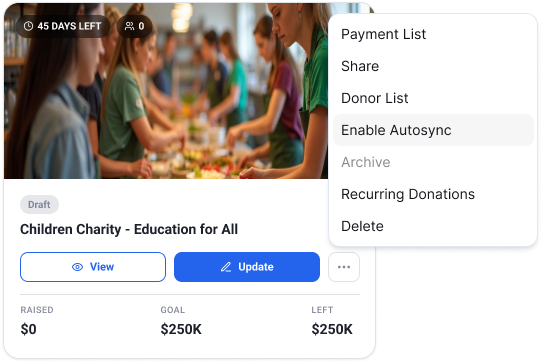
- Status — Shows whether your campaign has Started, ended, or is scheduled.
- Days Left — A countdown to your campaign end date.
- Raised — The total amount donated to this campaign so far.
- Goal — Your fundraising target.
- Donations — The total number of individual donations received.
Click View to open the public facing campaign page, or click Update to go back into the campaign builder and make edits.
📹 Watch: Edit An Existing Donation Campaign ⏱ 42s
Campaign Menu Options
Click the three dot menu on any campaign card to access additional management options:
- Payment List — View all payments received for this campaign. Learn more about tracking payments.
- Share — Open the sharing options to distribute your campaign link. Learn more about sharing your campaign.
- Donor List — View a list of all donors who have contributed to this campaign.
- Archive — Archive the campaign when it is no longer active to keep your list tidy.
- Enable Auto sync — Sync campaign data with connected integrations such as Constant Contacts and QuickBooks.
- Recurring Donations — View and manage donors who have set up recurring contributions.
- Make a Copy — Duplicate this campaign to use as a starting point for a new one.
- Delete — Permanently remove the campaign from your account.
Share your campaign
Learn how to share your Ideali campaign using a direct link, QR code, website embed, or social media to reach donors and start receiving contributions.
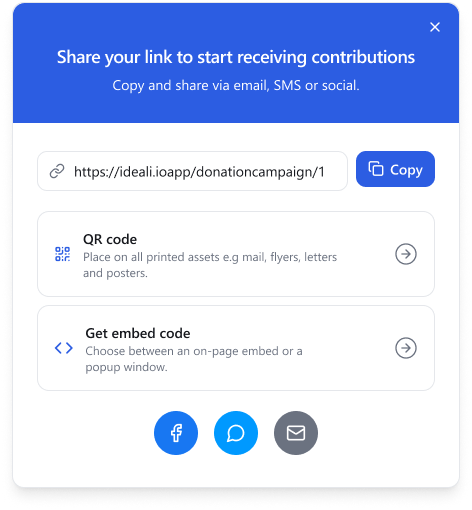
Campaign Link
Your campaign has a unique direct link that you can copy and share anywhere. Paste it into an email, send it via SMS, post it on your website, or share it across social media. Anyone who clicks the link will land directly on your donation page.
📹 Watch: Share a Campaign via URL ⏱ 35s
QR Code
Download a QR code for your campaign to use on printed materials such as flyers, posters, letters, and event signage. Supporters can scan the code with their phone camera and go directly to your donation page without having to type a URL.
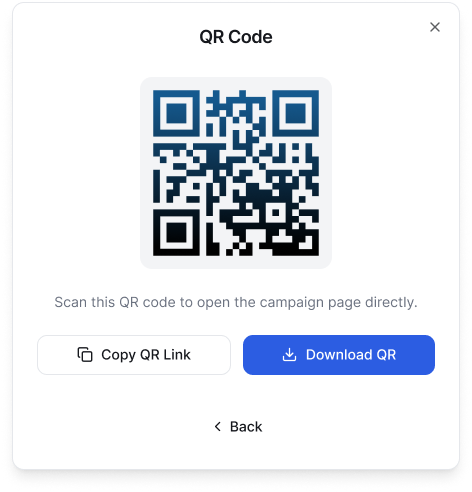
📹 Watch: Share Campaign via the QR-code ⏱ 39s
Embed Code
Add your donation form directly to your own website using the embed code option. You can choose between two display formats:
- On Page Embed — The donation form appears inline as part of your webpage content.
- Popup Window — The donation form opens as an overlay when a visitor clicks a button on your page.
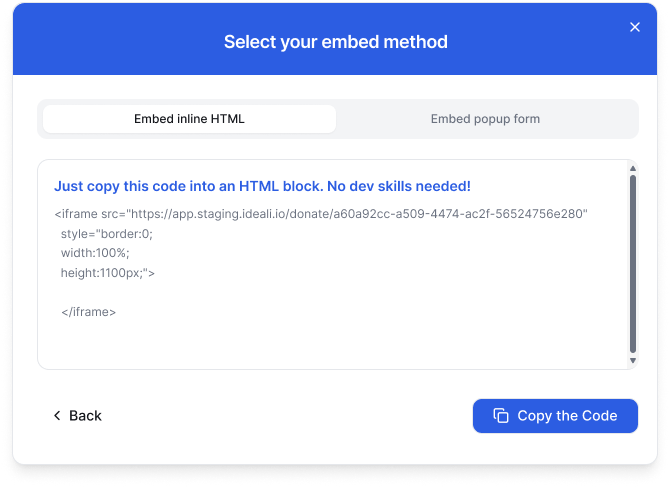
📹 Watch: Share Campaign via Embed Code ⏱ 33s
Social Sharing
Use the quick share buttons to post your campaign directly to Facebook, share via Email, or send through Messenger with a single click.
Duplicating or Cloning your campaign
Save time by duplicating an existing Ideali campaign and using it as a starting point for a new one, then update the key details before publishing.
If you want to create a new campaign that is similar to one you have already built, you do not need to start from scratch. Ideali lets you duplicate any existing campaign and use it as a starting point, saving you time on setup.
This is useful when you run the same fundraiser annually, want to test different versions of a campaign, or need to launch multiple campaigns with a similar structure.
How to Duplicate a Campaign
- Go to Donation in the left sidebar and click Campaigns.
- Find the campaign you want to duplicate.
- Click the three dot menu on the campaign card.
- Select Make a Copy.
Ideali will create an exact copy of the campaign including the name, description, goal, preset donation amounts, campaign color, banner image, payment account, and thank you email settings.
After Duplicating
The copied campaign opens in the campaign builder where you can make any changes before publishing. At minimum you should update the following:
- Campaign name — so donors and your team can distinguish it from the original.
- Start and end dates — to reflect the new campaign period.
- Fundraising goal — if the target has changed.
- Description — to keep the content fresh and relevant.
Once you are happy with the changes click Publish Campaign to make it live. For a full walkthrough of the campaign builder see Creating a donation campaign.
Managing Your Archived Campaigns List
Keep your campaigns list clean without losing your data. Learn how to archive ended campaigns.
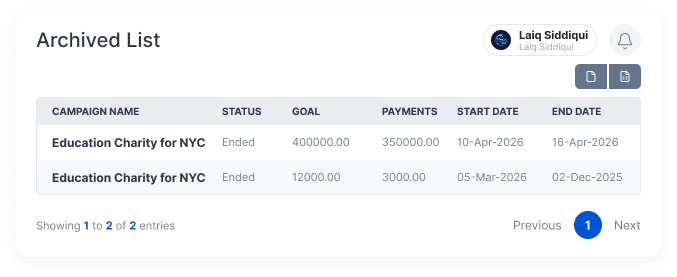
To access the Archived List, go to Donation in the left sidebar and click Archived List.
Which Campaigns Can Be Archived?
Only campaigns with a status of Ended can be archived. Active or draft campaigns cannot be moved to the archive until they have reached their end date and are no longer accepting donations.
Reading the Archived List
Each row in the archived list shows a summary of the campaign:
- Campaign Name — The name of the archived campaign.
- Status — Will always show Ended for archived campaigns.
- Goal — The fundraising target that was set for the campaign.
- Payments — The total amount received during the campaign’s lifetime.
- Start Date — The date the campaign began accepting donations.
- End Date — The date the campaign stopped accepting donations.
Archiving a Campaign
To archive an ended campaign, go to your Campaigns list, click the three dot menu on the campaign you want to archive, and select Archive. The campaign will then appear in your Archived List and will no longer show in your main campaigns view.
Exporting Your Archived List
Use the export buttons in the top right corner of the Archived List page to download your archived campaigns as a PDF or spreadsheet for your own records or reporting needs.