
Embedding Your Donation Campaign in WordPress
The Ideali Donate plugin makes it easy to add your donation campaigns directly to your WordPress website.
Installing the Plugin
- Log in to your WordPress admin dashboard.
- Go to Plugins and click Add New.
- Search for Ideali Donate.
- Click Install Now and then Activate.
You can also download the plugin directly from the WordPress plugin directory.
Adding Your Campaign
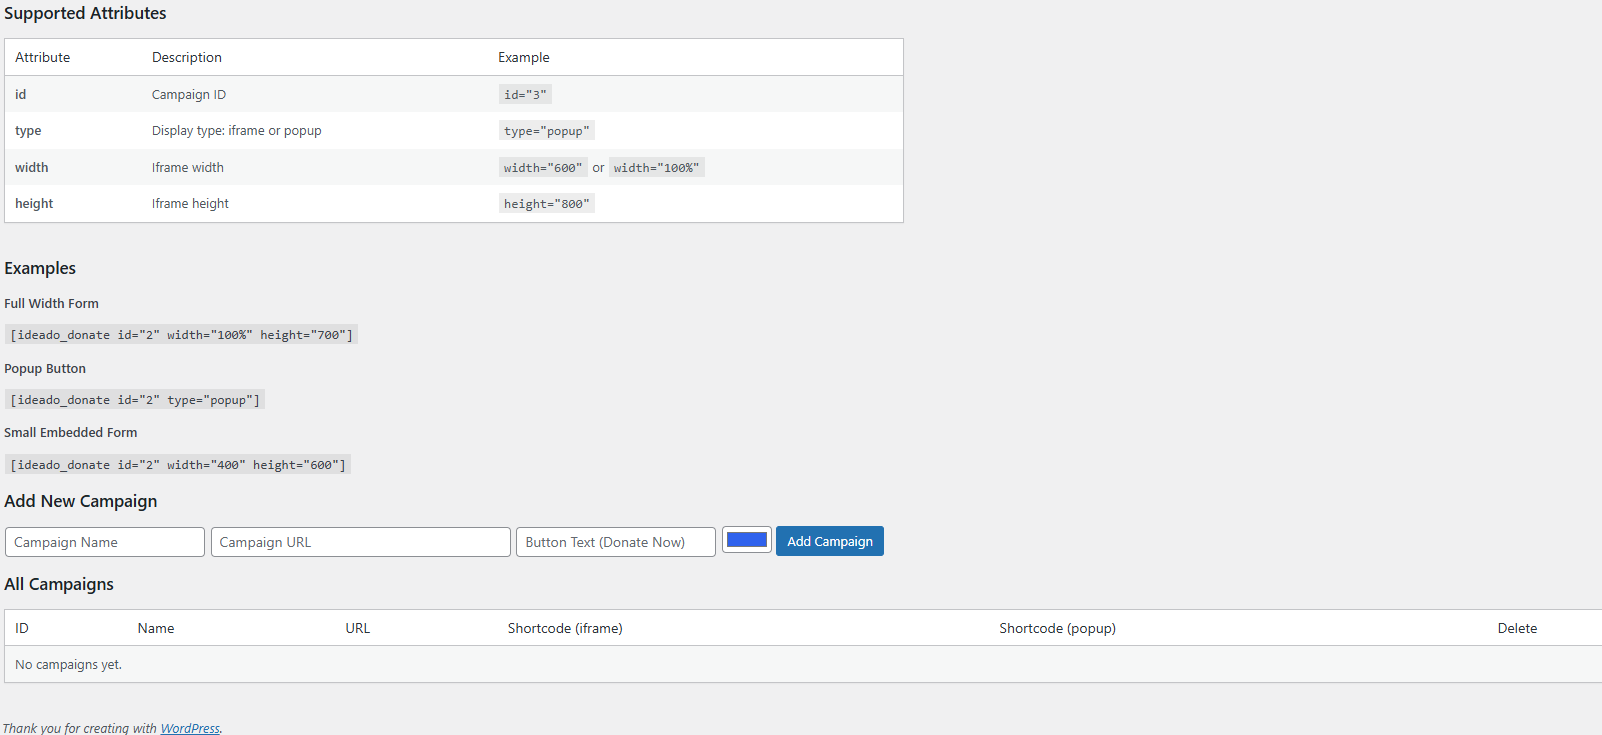
Once the plugin is activated, go to the Ideali Donate menu in your WordPress dashboard. Under Add New Campaign enter your campaign name, your Ideali campaign URL, and a button text label such as “Donate Now.” Click Add Campaign and the plugin will generate shortcodes for you automatically.
Using Shortcodes
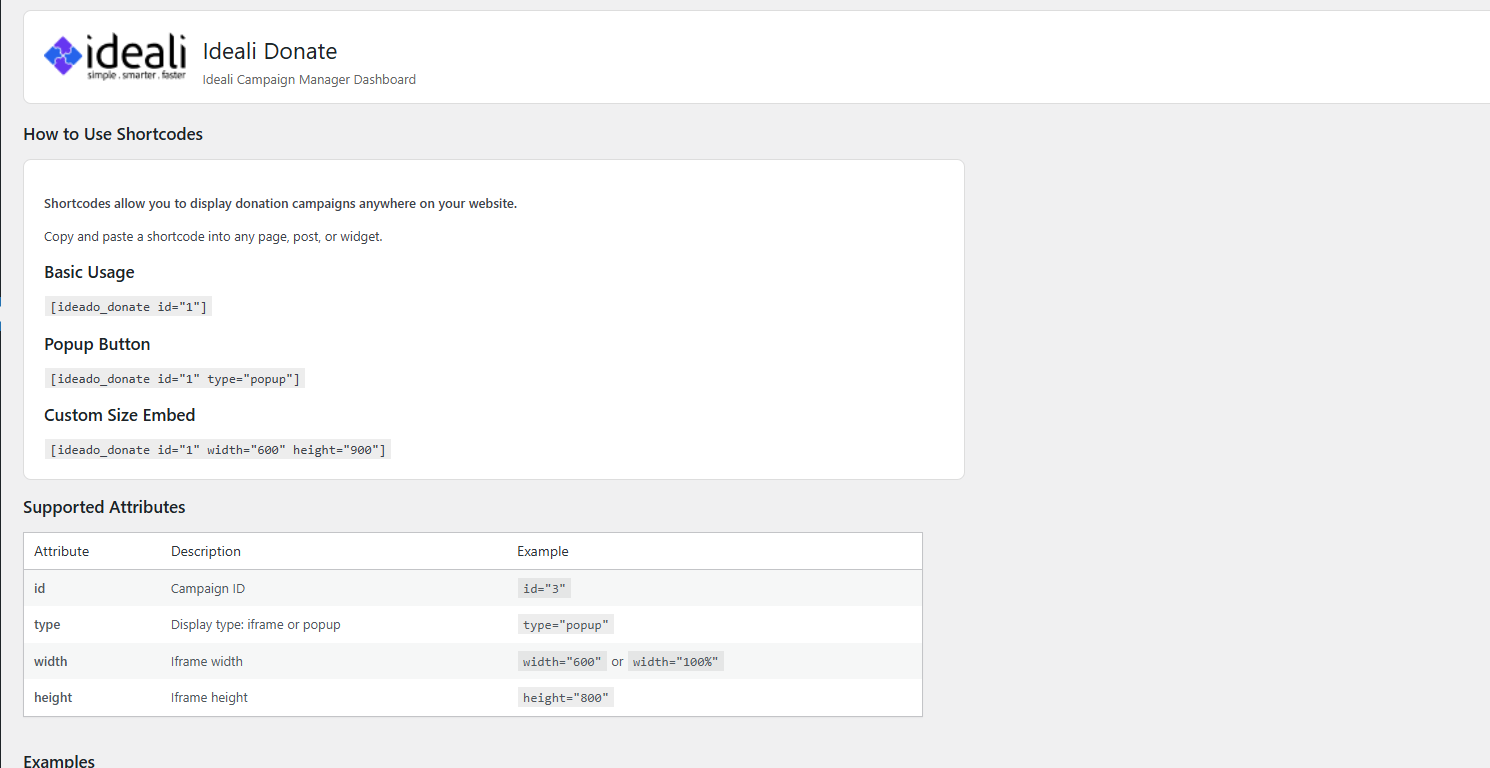
After adding your campaign, the plugin provides shortcodes you can paste into any page, post, or widget to display your donation form. There are three ways to embed your campaign:
- Basic embed — Displays the donation form inline on the page.
[ideado_donate id="1"] - Popup button — Displays a button that opens the donation form in a popup overlay.
[ideado_donate id="1" type="popup"] - Custom size embed — Displays the form inline with a specific width and height.
[ideado_donate id="1" width="600" height="900"]
Supported Attributes
You can customize the shortcode using the following attributes:
- id — The campaign ID. Example:
id="3" - type — Display type, either iframe or popup. Example:
type="popup" - width — The width of the embedded form. Example:
width="600"orwidth="100%" - height — The height of the embedded form. Example:
height="800"
Shortcode Examples
- Full width form —
[ideado_donate id="2" width="100%" height="700"] - Popup button —
[ideado_donate id="2" type="popup"] - Small embedded form —
[ideado_donate id="2" width="400" height="600"]
Managing Multiple Campaigns
You can add as many campaigns as you need. The All Campaigns table at the bottom of the plugin page lists every campaign you have added along with its ID, name, URL, iframe shortcode, and popup shortcode. You can copy the right shortcode for each campaign and place it anywhere on your site. To remove a campaign, click Delete next to it in the list.
Connecting QuickBooks in Ideali
Keep your bookkeeping accurate without manual data entry. Learn how to connect your QuickBooks account through Ideali's Connectors
Ideali integrates with QuickBooks to help you keep your financial records accurate without manual data entry. Once connected, you can sync your payment data directly to QuickBooks for easier bookkeeping and reporting.
Connecting QuickBooks
- Go to Settings in the left sidebar and click Connectors.
- Click Add Integration.
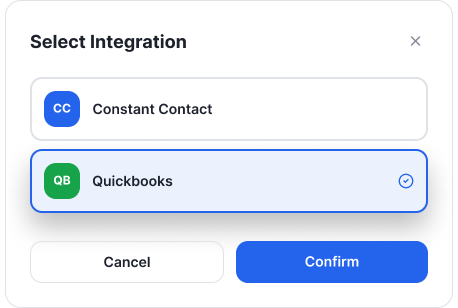
- In the Select Integration window, choose Quickbooks.
- Click Confirm to proceed and connect your QuickBooks account.
Once connected, your Connectors page will show QuickBooks as Connected along with the date and time it was linked.
Syncing Payments to QuickBooks
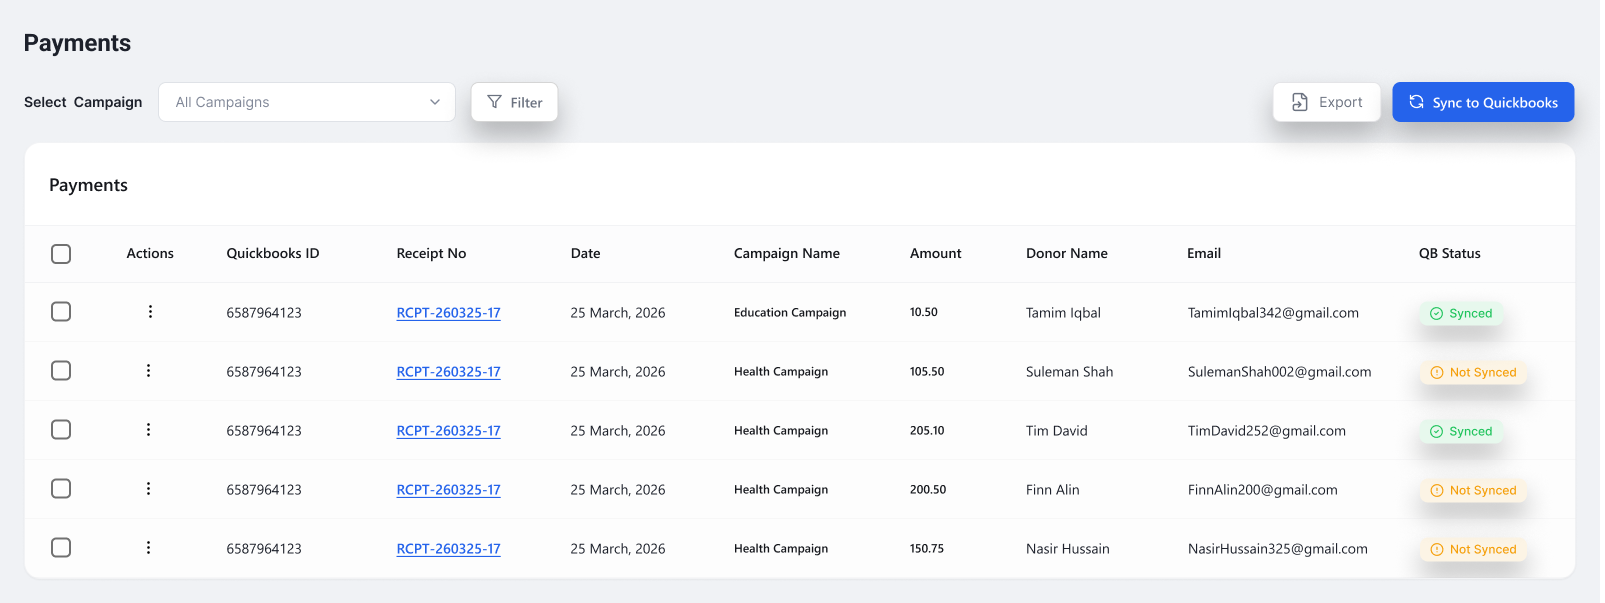
After connecting your account, go to Donation in the left sidebar and click Payments. Here you can review all your transactions before syncing them.
- Use the Select Campaign dropdown to filter payments by a specific campaign, or leave it on All Campaigns to view everything.
- Use the Filter option to narrow down the payments list further if needed.
- Click Sync to QuickBooks to send your payment records over.
Understanding QB Status
Each payment in your list shows a QB Status indicating whether it has been synced:
- Not Synced — The payment has not yet been sent to QuickBooks.
- Synced — The payment has been successfully recorded in QuickBooks and will show a corresponding QB ID.
Connecting Constant Contact in Ideali
Keep your donor contacts up to date without any manual work. Learn how to connect Constant Contact through Ideali's Connectors and sync your full donor list.
Ideali integrates with Constant Contact to help you keep your donor contacts in sync with your email marketing tools automatically. Once connected, you no longer need to manually export and import donor information every time someone gives.
Connecting Constant Contact
- Go to Settings in the left sidebar and click Connectors.
- Click Add Integration.
- In the Select Integration window, choose Constant Contact.
- Click Confirm to proceed and connect your Constant Contact account.
Once connected, your Connectors page will show Constant Contact as Connected along with the date and time it was linked.
Syncing Your Donors
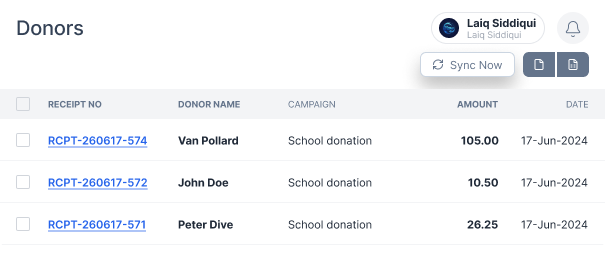
After connecting your account, go to Donation in the left sidebar and click Donors. Here you will see a complete list of everyone who has contributed to your campaigns, along with their receipt number, campaign, amount, and date.
Click Sync Now in the top right corner of the page to sync your donor list with Constant Contact. This keeps your email marketing contacts up to date automatically, so your donors are always ready to receive your campaigns, newsletters, and updates without any manual work on your end.